About

Building Information Modelling (BIM)

Building Information Modelling (BIM) is frequently used nowadays to transform building designs from 2D paper into 3D in a digital form. BIM is not just about geometry, it is also used to show the spatial relationships, analyse the light orientation, properties of building components, quantities etc.

A site in a digital model form


Building information  modelling can be considered as an illustrated prototype of either a building, a site or even a city. It allows any aim of a design's performance to be stimulated and assessed before it is built, helping us to understand the design more and easier. BIM is not just a 3D model, it's information gathered together that can be used by all the members of the team that work on a project.

It is a very convenient method to use in the industry as the digital model goes from one professional to the other allowing them to make the changes they need to do on their field of expertise. BIM goes through a life-cycle when a project takes place: Management of building information models, Building Information Modelling in construction industry and Building Information Modelling in facility operation.

While architects are mostly making models out of materials, architectural technicians are strictly required to know how to use BIM software. However, BIM is starting to becoming a fashion whereas actual models are slowly fading away resulting architects to be required to use such softwares too (in the same way of how AutoCAD was originally for architectural technicians and architects would draw by hand).


Softwares for BIM:

There are many different softwares that can be used to illustrate a 3D digital model. I have tried only three of them and these three I am going to talk about.

Rhino is a software which is about generally making digital models, not only houses, therefore this is not used only in the construction industry, it is a model making software for general views, and for this reason it's considered to be the hardest to use.

Screen shot of a work made with Rhino software


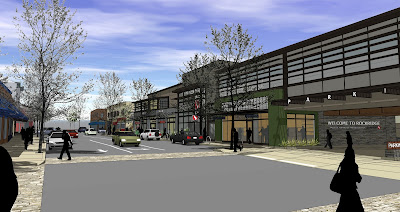
SketchUp is another software that can be used. A software special for designing buildings, personally I find this software the hardest to use as when I got my hands on it I couldn't draw a single line because of it's complexity. However, as I have previously seen from some of my colleagues work, if you manage to learn to use this software, a lot of realistic designs can be illustrated on it!


Samples from SketchUP software


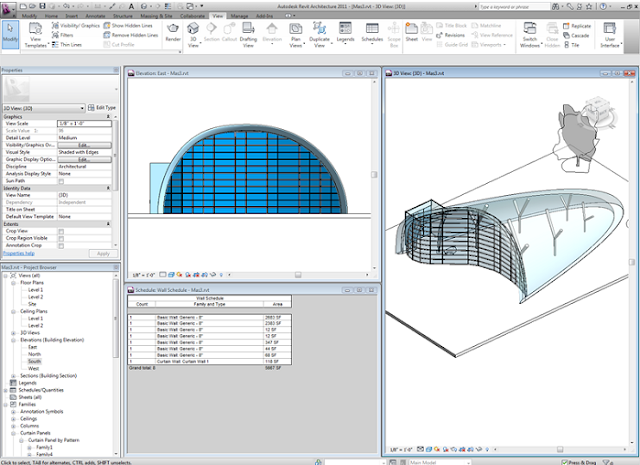
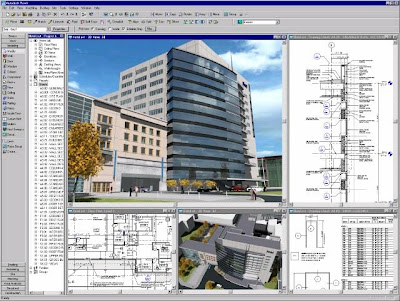
A software I would highly recommend is Autodesk Revit. It is obviously provided by Autodesk, which means it's strictly for building modelling only.

Screenshot from a work of Autodesk Revit Architecture


I find that software very easy to use, especially if you know how to use AutoCAD (which is required). It is just like how AutoCAD is being used but what makes it even easier is the fact that you don't need to determine the wall thickness, or the design of the roof etc. Revit has all these things ready for you - you select to draw a wall, you set up what type of wall you want and with a single lien you have it all.

Another reason why Autodesk Revit is easy to use is when you draw your model you don't already draw it in a 3D form, you draw the floor plans and with a simple click, the software will turn your drawing into a model. And there you have it.

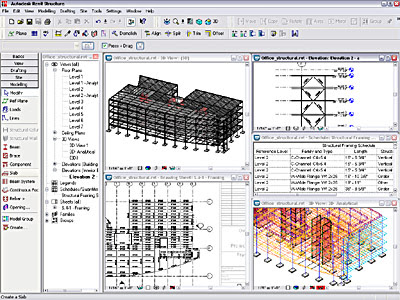
Screenshot from a work of Autodesk Revit Structure    


Note: Autodesk Revit used to be divided to two software: Autodesk Revit Architecture and Autodesk Revit Structure, Revit Architecture is based mostly on the design of the building and how it will look and Revit Structure is based on designing the structure of the building. Until 2012 these two softwares where divided like that but in the 2013 version Autodesk decided to combine the two in one software.


Autodesk 123D

I came across this new software Autodesk which was not released long ago, only few months back.

This software is divided in three applications: Catch, Design and Make.


The Catch app allows you to insert multiple angle pictures of an object and the fotware will turn these pictures in a digital model, all by itself. (download from: http://www.123dapp.com/catch)


The second application, which is the 123D Design app of the software allows you to design an object however you want it (see examples: www.123dapp.com/design). The application is available for PC and Mac, iPad and there is a web app. This way you can carry on any work you have instantly and anywhere you are.
(visit www.123dapp.com/design for video and examples)

The next app, is also my favourite, it's the app called 'Make'. It literally does what it is called. Any models you have caught on picture and put it in your software or made it in the software can be materialised. In this part, the software makes your model into layers where you can extract and print each layer separately and will guide you to put them all together to form the model you have made.
(visit http://www.123dapp.com/make for video and examples)

The applications can all be downloaded from the links provided for free.

LiTraCon (Light Transmitting Concrete)

One of my favorite materials that I would like to use in one of my future designs is the LiTraCon, a short name for Light Transmitting Concrete. It has been discovered by the Hungarian Architect, Áron Losonczi in 2001.

It presents the phenomenon of light transmitting concrete in the form of a widely applicable new building material.


In the concrete mix includes thousands of fibres that form a matrix and they run parallel to each other between the two main surfaces of each block. The pro
portion of the fibres is 4%, which is relatively small compared to the volume of the brick. These fibres become structural components of the LiTraCon concrete and they work like aggregates, that is because of their small size that helps them mix in the concrete. 

Load-bearing structures can be also built of these blocks, since glass fibres do not have a negative effect on the well-known high compressive strength value of concrete. The blocks can be produced in various sizes and with embedded heat-isolation.


In the picture above you can see the use of LiTraCon concrete at Stureplan in Stockholm, which was made in 2002 for a competition. The special material looks as a normal concrete block would but when the night comes, light from underneath the concrete blocks lights up and then the unique properties of this material come out, as seen from the picture below.


Imagine if in this material was used in most of the buildings now. The buildings would seem like they are lighting up as if they are lamps themselves and streetlights would not be used as long as they are used now. Can you imagine the energy we would save that way?

Green Roofing - Sustainable Construction Strategy

A subject that really interests me is the Green Roofing. I've seen quite a few pictures searching the internet with gardens and trees on top of the houses and I always wondered how this worked. By that I mean, how is it possible for a roof to hold a garden and not be damaged from the water that trees need to be sustained?


After some small research, I found out that holding the garden was not as hard. In fact, green roofing has a lot of benefits and it is considered as part of sustainable construction.

There are two types of green roofing, the extensive roof gardens and the intensive roof gardens. The extensive roof garden is a hardy mat of sedum vegetation requiring little maintenance whereas the intensive roof garden is an actual garden on the roof with lawn, trees, ponds etc. which needs as much care as any other normal garden.

These two pictures below are going to help you to understand how the structure is established to install a roof garden, the top picture is for single layer fully grown system and the other is multi-layered pre-grown system:


A green roofing has a lot of benefits to give you for your design. Most of them are environmental benefits, which will also affect the occupants of the building. And there can also be some financial benefits.

Environmental benefits include:


  • Great insulation for both winter and summer
  • Sound insulation as soil blocks lower frequencies while the plans can block higher frequencies
  • Provides habitat for fauna and flora species
  • Retains 70-90% of rainwater, that can prevent pressure on the drains and river pollution
  • Does not reflect heat
  • Filter pollutants and carbon dioxides from the air preventing deceases (asthma etc.)
  • Increases agricultural space and many more

Financial Benefits:


  • Increases the roof's life span as green roofing protects the roof from UV light
  • Increases real estate values
  • Reduction in energy uses
A disadvantage that the green roofing would bring is that it costs for a green roofing to be applied in a building. First is the waterproofing that needs to be installed, and additional bearing loads need to be considered as the soil can be heavy if gathered together.


In my opinion the environmental advantages are far greater than the one disadvantage that needs to be considered. Personally I think this is a great strategy that can be used for a sustainable construction as well as a great design of a building and it would be great if green roofing started being applied in buildings.

How to Take a Proper Site Investigation (mainly for the UK)

Before I started my course at university I had a very wrong Idea of what a site investigation is. I thought it was just going at the site and taking pictures to see how big it is and write it in the report. Well, I couldn't be more wrong about it.
There are two parts that make up a site investigation complete. The desk study, which is information taken from databases, the internet and other sources, and the walk-over survey, which is generally going on the site to analyse the area. The site investigation is always made by the architect who is designing the building.

In the previous post I did for ' How to Present Work for your Portfolio/University Assignment' I said in the site investigation part that 'site investigation can be seen differently according to what is your occupation, for example, an architect will see the design on the surrounding buildings and figure out whether he would make his design stand out or blend in with the surroundings of the area, whilst a Geologist will analyse the soil of the site'. A site investigation is both these two and many many more. This statement was made by my university professor who had his first lecture bout site investigation.

Desk Study:

The desk study is all the information found about the area without having to attend the site. You can find the information you need from databases, the internet etc. This part of the study consist of the biggest amount of information you need to find.

- Local climate: this information is useful as temperature varies with location, houses expand or shrink therefore calculations need to be taken before designing the house, also this can affect the choice of the material. Another reason that this information is needed is because of the insulation that is going to be installed on the house and the temperature resistance that is required.

- Wind/Windspeed: wind can be considered as a load on the building. The taller the building is, the bigger the wind force is going to be and therefore that can affect the structure-type that has to be used to be designed. Also the wind force depends on the location that the site is located, take as an example in the city of London, the wind speed is going to be less than where in the coast of England is going to be at the same height.


- Snow: when the site you are designing for is located in an area that snows that would require a building that is going to take greater loads. When a lot snow is gathered it can put great loads on the roof of the house.

- Sunshine: this is important for the design of the building, and by that I mean with the location of the windows and openings, whether you want to design the house so it lets a lot of daylight in or to minimise the light (it may sound weird but it depends on the use of the building you are designing for)

- Frost: in different locations there is a problem with frost on the houses and that can damage the material of the building. For example, when you are designing a house where it is on a location where there is danger for frost to happen, frost-resisting brick has to be used for it.

Other information that need to be found: annual rainfall.

All these information can be found from the Met Office, which according to wikipedia is the United Kingdom's national weather service, and a trading fund of the Department of Business, Innovation and Skills.

- History of the site: this can give you a lot of information as if you search the history of the site you can figure out whether there was a previous building located in the same area, that would mean that the foundation system of the previous building is still under the surface which can affect the foundation system that you will use (if there are existing foundation systems you will need to use pile foundations for your buildings so the piles would penetrate the existing foundation systems and go deeper in the soil).

This information can simply be gathered from ordinance surveying maps, which can be found easily from digimap.edina.co.uk under the 'Historic' category where you can view the map of your area by decades, and air photographs that can be specifically found in the Planning Department of the Local Council.

- Banning Distrains: you need to find out about the banning distrains so you can figure out if you can build on the chosen site for the usage you need to design. There are some areas you cannot built at all, and some areas for only houses or that they are only industrial. This information can also be found from the Local Council.

- Location of Services: in this part you need to find where the electric wires are, the surage pipes, gas wires, water pipes etc. You are putting a building there, therefore you don't want to damage them. You can find this from the Highway Department, which is also part of the Local Council.

- Flood Risk: if there is a high risk of floods in the area, the building will be made out of concrete which is waterproof (if there are floods by the sea there is going to be used a sulfate-resistant concrete), or all the important rooms will be positioned on the second floor, or any other techniques can be used.

You can find this information from flood plans that can be taken from the Environment Agency or from their website by inserting the post code.

- Type of Soil: the main reason why the soil has to be analysed for a site investigation is because the type of soil can affect the type of foundation system that has to be built. It is very tricky to find this information because a lot of times we can get the wrong information about this, therefore you have to make sure to get the information from the right place. You can find this information (for the UK) from the British Geological Survey as they already have samples of the soil of all areas in Britain.

- Tunnels for underground: you need to know whether you are building on top of underground rails (mainly for London, but also any city that has underground facilities). That is because if you are building a tall or wide building you have to consider the underground stations and that pile foundations cannot be used, therefore other technologies can be used to support the building. You can find out about this with a very simple and easy-to-get source, that is the A-Z maps.

- Post office tunnels: Years ago in London they were using underground post office tunnels to deliver the mails or packages, even though this facility is not in use, the tunnels are still there, therefore for the same reason as the underground tubes, they can affect the foundation system you are going to use.

- Archeological history of the site: if you are building on a historic site, archeologists have the power to stop the site investigation because you can ruin the history of the area. You can get the approval from the Archeological Department from the Museum of London or county Archeologist if it's outside London.

- Mobile phone masts: if there is a mobile phone mast in the area then a house or facility that it's is going to be used for children cannot be built as radioactivity can have severe effects on kids in young age.

- Pilots: you need to find out whether planes pass above the site frequently. If yes, then this can affect the electrical substations

- Train lines / Highways - main roads: from maps you can find out whether there are train lines, highways and/or main roads close to the site as they make a lot of noise and vibrations, this can affect the structure of the building (vibration resistant etc.)

Walkover Survey:


- Architectural context: in this part is where you are going to see the surrounding architecture and decide whether you are going to design the building to blend in with the surrounding buildings or make it stand-out. This will affect your first ideas of your design.

- Trees: you need to find information about the trees (or grass) in the area as you can realise whether there is water in the soil and if the water content is high. Again this will affect the foundation system properties.

- Ecology: find out about the natural life around there, that includes the insects, foxes, rare butterflies etc. You don't want to affect the environmental life in the area.

- Access of the road: last but not least is the access you are going to have for your building and if there is not any you are going to figure out how you are going to create the access without affecting the previous factors.

All this information is needed to complete a site investigation. It is not only about the design of the buildings, or about the ecology of the site, it's much more than that, it's the technology of the building too, it need to be considered as technology is what will make the building stand up.

If the site investigation is not correctly taken, it can cost millions. The wrong information taken can affect the technology that you decide to provide for the building, technology can always fail, therefore you need to make sure you have all information possible to avoid this happening.

How to Present Work for your Portfolio/University Assignment

I just finished my first year of my course of Architectural Technology. I started my course last year from a foundation degree called 'Extended Degree in the Built Environment'. As part of the course we had to design buildings for us to create a portfolio to present in the end of the year, that would determine whether we would pass on the next year or redo the foundation course.

When I was designing my building, I had some problems with presenting my work because no one, including the professors, would come to us and tell us how to present our work, and that cost me a lot of marks.I asked a friend of mine who is studying architecture and she have already presented some assignments, and you have to believe when I say this, but I wish I have asked her from last year as presenting your work, in my opinion, is the most important factor in your portfolio. In this year, after I asked my friend how to present my work, I had a killer design to show for my portfolio and got me much better marks than the year before.

First of all, a portfolio has to be correctly in place. When you are designing your building, not everyone is going to understand how you came up with the idea, what reason led you to design the building that way and why would you do it that way. It is a way to put your thoughts together so your audience would understand your design. These things matter not only for when you are presenting your work to your professors and university critiques but also when you are applying for a job or an internship in the future. Going to university is your first step to create your portfolio, it's time given to us, the students, that we will not find later, besides you can always show your portfolio to your professors and get feedback on it. And thats why another reason is that it makes your portfolio look better. It is very important for your portfolio to look professional as it is the way you are selling yourself. If your portfolio doesn't look professional that would mean that your work is not professional either, and nobody would hire you.


Steps to present your portfolio:

1. Site investigation

The first part you should present in your portfolio is the Site Investigation. You cannot design a building if you don't have a site to build it on, even if it's an imaginary building. It is important as the space, the shape and how the location of the site will affect your design.

A site investigation can be seen differently according to what is your occupation. For example, an architect will see the design on the surrounding buildings and figure out whether he would make his design stand out or blend in with the surroundings of the area, whilst a Geologist will analyse the soil of the site. A site investigation is both these two and many many more.

1.1 Maps

The first thing you should include in your site investigation are the maps. In my projects for my course I included two satellite maps, with scale of 1:50 and 1:100. The scale you are going to include is not always specific, it depends on the area of your site. If it's a big area then you will need to show it in bigger scales, and if it's a smaller area then you will need smaller scales to show them.

After you show the satellite maps you need to show surveying maps. Surveying maps can be found on digimaps (http://digimap.edina.ac.uk/) after you have registered.

The most important map you are required to show is the map that indicates the usage of the area. In this map you will note with highlights of different colours what there is around the area you are going to build. Use different colour for domestic buildings, different colour for schools, different colour for shops etc. That way you are showing how good the area is to build on and how it can be used by the occupants of the building.


1.2 Pictures

You should also show pictures on your presentation taken of the area you chose. If you cannot find an area to start your design on you can go on google maps and check in the area you want to find your site. If it is a paid work, then an area obviously will be given to you.

After finding the area that you desire to design on you should go to see for yourself how it is, and of course take pictures of it. 'A picture says a thousand words' as they say, and it's true. From the picture your audience you are presenting to can see how big it is as if they were there themselves, just by looking on the map will not be clear to your client how big the area is and how big the building that can be put on it can be.

1.3 Sketch Section

A sketch section is a section of the area that you chose including the surroundings. This helps you to show the difference between the height of the buildings around the site. It will help you with the first idea of your building, that is if you want your building to be taller, as high as the other buildings or even shorter according to the surrounding facilities. Well, it's a start, right?

2. Precedent Research

To be honest, I am not sure if a precedent research is required when you present to a client, but this post  is mainly about building a portfolio or presenting your work as work assignment, and for that it is required to have a precedent research to show.

A precedent research is basically your inspiration that led you to your design, you can either chose a building or an architect.

If you are going to base your design on a building you need to research about that building, what makes it special and which of those properties you are going to chose to put on your building.

If you are going to chose an architect you would like to be inspired from you are going to be required to research his designs, what principles the architect is using to design his buildings. You can include both an architect and a building that you were inspired from.

This part is very important as the critiques who are going to see your project will have to see how you came up with your designs. Showing a precedent research shows that you have the potential to research as well as you have some inspirations. There is never been a designer who just came up with his first design, there is always going to be an inspiration, and you need to show that.

Be careful, though, you don't want to copy another design. There is a fine line between inspiration and copying and it is very easy to pass that line.

3. Developing you Ideas

After you have  found your site that you want to build on and made your precedent research you can start designing your building.

3.1 Brief

A very very important part of showing your ideas is the brief of the idea. In the first critique I presented my work I didn't include a brief in my presentation and that cost me most of the marks. In this part you are describing your idea that you have for your building.

That includes the usage of the building, who are the occupants going to be, whether the building is domestic or an office building etc. You are going to refer what you are going to do with the area, e.g. if you include more than one block, if you are going to have a space for the public to use. And of course you are going to refer to your precedent research, how it inspired you and what parts of your inspiration you are going to use on your design.

3.2 Sketches

You cannot show how you developed your idea to your final design without sketches. You have to make a lot of sketches that will show to your audience how you got to your design. Be careful, though, if you make a lot of sketches, you don't need to include all of them in your presentation. Imagine if you made around 50 sketches, those would take up a lot of pages and would lose interest on your presentation. If you make that many sketches you are going to have to chose few of them to include in your portfolio, those are going to be the main ones that led you to your design.


3.3 Sketch Model

You are never going to have one final idea. An architect/designer will have lots of final ideas until he is in his completely final conclusion. Few of those 'final designs' that you are going to have you will also make a model of them, sometimes you don't know whether it's your final design or not until you have made a sketch model of it.

In my project, I came up with a design, which in my opinion looked good until I made a sketch model of it, after that I thought it was completely weak to be the final idea. You are going to include those models too and explain why those didn't make it to your final design.

4 Final Idea

After the many sketches you make and few sketch models, you will eventually come up with your final idea. In that part you are going to put the final sketch that led you to the final idea. There you are going to explain why this is your final idea and what led you to this design.

4.1 Drawings

The drawings are very important, those are the ones who will explain to your audience your design when you are not there to explain it yourself.

In the drawings is where you start become more technical. The first drawings are always the floor plans, then you are going to include elevations of your design and of course after that comes the sections of your building.

The next few drawings are not required to be drawn by an architect, but they are very important if you are an architectural technician as a technician focuses on the technical side of the design.

After the main drawings you are going to include the structural plan, which will show only the walls and columns that take the bearing loads.

Continuing from the structural floor plans, we come to the section detail drawings. In these drawings you will go deeper in your design and describe more details. In our project for this year we were required to make four section detail drawings but when you are presenting your work to a client, more section details will be required.

The most common section details are:


  • The ground floor junction, which describes how the ground floor is connected to the foundation,
  • the  roof eve section detail, which shows the roof system you want to use,
  • the window section detail and
  • the party wall junction with the floor and the ceiling.


In all these section details you have to include information of the insulation you want to be used in the building, type of concrete, type of floor finish, type of rendering etc.

And the last drawing you will be required to show is the site strategy. In this drawing you don't need to design your building in detail, you can just copy paste the external walls into the site map (remember, it has to be on the correct scale). This is to show how the area is going to be used when the building is built and how the site is going to be used.


Remember: In all your drawings include name-box, you can get a lot of samples from the internet and AutoCAD itself. They are very important as they give information of who the designer is, who is it for, what the drawing is about, the scale of the drawing etc.

5. Model

After you have finished with the drawings of your design you will be required to make a model. Architects mostly they build their models with materials from the model shops etc. But architectural technicians tend to use mostly BIM (Building Information Modelling), it is a digital model of your building that can be drawn with Autodesk Revit, AutoCAD 3D, SketchUp and many other software. In my opinion, for this type of modelling, Autodesk Revit is the best on this, it is easy to use and it's exactly why this software exists. If you don't know how to use any of these software yet, you will still be required to make a model, therefore you are going to go by the architect's method and build one with  materials from an art shop or a model shop.


Remember:


  • that your model has to be professional looking. If you are making the model yourself, try not to have glue all over your materials as it will not look as professional when you present it and
  • take pictures during the process of making your model, you will be required to show that process of making the model.
These five parts are the most important that you have to include in your portfolio. All steps are important to help you show how you came up with your design, how you worked and how your work turned up. If you miss out a step, that can cost you the whole presentation as the critiques ill not be able to tell how you went to the next step. You have to make sure everything is clear to them.

More details can be added, but they are not critically required at university. For example, I included light orientation of my building in the four different seasons of the year, or you can include the wind direction throughout the year etc. These will definitely get you extra marks.

Note: If your project is a Proposal for Development, it is not required to include a client or a site investigation, wind direction, light orientation and any information that are affected from the location and the site of your project. That is because you are making a proposal of one of your designs to be used in various sites.

However, you are required to include a brief of your project with all the drawings required. If you are going to be inspired by a design or an architect, it is recommended to include that as part of your brief, not too many words as you don't want to draw attention and make the critiques or viewers compare your design.

Casa Lude, Spain

The way this house stands amazes me! I also found the information for this house while I was on the Architectural Review's website.


It is a house that is built on top of an existing house in Spain with a budget of 120,000 Euros. 

The first thing that I thought was how could a house be built on top of an existing house? The existing house doesn't look like it can take the loads of another house on-top as we know that is the first concern when adding a floor on a building, might as well if you add a new house, but that's where the technology of architecture helps this project to be erected. 


To build this house, they didn't build straight from the existing walls, instead they replaced the existing roof with a new concrete slab that is supported from the existing walls, allowing the architect to make a bigger space for the new addition.


The amazing thing is that this house is a light-weight steel framed house so it can be supported from the existing building below it as steel can be lighter than concrete.

The way the walls where designed as seen on the floor plans is allowing more space to be used expanding it from 80 sqm to 130 sqm. This arrangement also allows more light to have access in the house throughout the whole day and is also wind-resisting.


The pictures below illustrate the section of the building, the floor plan of the mezzanine floor of the house and its 3D model.


Architects: Grupo Arena
(Pictures and information taken from AR)

MuCEM, Marseille, France

I was reading the August issue of Architectural Review magazine the other day when I came accross to a spread about a museum that was recently built at Marseille in France.


MuCEM has a fascinating cladding that could have easily achieved by using steel, but the architect, Rudy Ricciotti firmly believed that the façade should be made out of concrete, that was because concrete is resistant to corrosion and is more environmentally friendly than steel.


Not any type of concrete would work for the occasion. The type of concrete that was used for this particular cladding is ultra-high-performance fibre-reinfrorced concrete, or otherwise 'UHPFRC'

UHPFRC is not the type of concrete that can be applied on the building in-situ (in-situ is a term that means that it is built on site), it can only be precast and delivered on the site.

This also helped Ricciotti designing elegant, tree-like columns that will resist wind loads and bearing floor loads.


Source: Architectural Review, August 2013 issue

Welcome to Architectural Technology

Welcome to my brand new blog about Architectural Technology. 

According to the Chartered Institute of Architectural Technologists (CIAT), Architectural Technology is the technical side of design - it can be about how things look but mainly it is about how buildings work. It's all about problem solving and turning conceptual drawings into reality. It's understanding design and the buildability of buildings.


In this blog I will be posting about the technology of the buildings (how they stand and work, their technical elements) as well as their design.

I am also the creator and one of the admins of Architectural Technology Facebook page (link: http://www.facebook.com/architecturaltech)